Binoculars vs Telescope | A Comprehensive Guide

Binoculars vs Telescope

Binoculars and telescopes are two popular optical devices used by nature enthusiasts, astronomers, birdwatchers, and hunters for observing distant objects. While both have a similar purpose, they have distinct differences in terms of design, function, and usage. In this article, we will discuss the differences between binoculars and telescopes, their advantages and disadvantages, and which one to choose based on your requirements.

Binoculars vs Telescope: Overview

Binoculars and telescopes are two popular optical devices used for observing distant objects. While both have a similar purpose, they have distinct differences in terms of design, function, and usage. Binoculars are handheld optical instruments that use two lenses to produce a magnified image of distant objects.

Telescopes, on the other hand, are stationary optical instruments that use one or more lenses or mirrors to gather and focus light from distant objects. They are usually mounted on a tripod or other stable surface to maintain stability and precision.

Design and Function

Binoculars are designed to be handheld and used with both eyes, whereas telescopes are designed to be stationary and used with one eye. Binoculars use two identical lenses to produce a three-dimensional image, while telescopes use one or more lenses or mirrors to produce a flat image. Binoculars have a wider field of view, which makes them ideal for observing moving objects, while telescopes have a narrower field of view, which makes them ideal for observing stationary objects.

Binoculars vs Telescope

Magnification and Aperture

Binoculars have a lower magnification power than telescopes, typically ranging from 6x to 12x, while telescopes have a higher magnification power, ranging from 20x to 300x or even more. This makes telescopes ideal for observing celestial objects like stars, planets, and galaxies, which are often too distant to be seen with binoculars. However, high magnification also means a narrower field of view and a higher chance of image shake or blurring due to hand tremors or atmospheric turbulence.

The aperture size is another important factor to consider when comparing binoculars and telescopes. Aperture refers to the diameter of the lens or mirror that gathers and focuses light. The larger the aperture, the more light can be collected, and the brighter and clearer the image will appear. Binoculars usually have smaller apertures, typically ranging from 25mm to 50mm, while telescopes can have larger apertures, ranging from 60mm to 300mm or more. This makes telescopes better suited for observing faint or distant objects that require high light-gathering power, such as nebulae or galaxies.

Portability and Size

Binoculars are generally more portable and compact than telescopes. They can be easily carried in a backpack or purse and used on the go without the need for a tripod or other support. This makes them ideal for outdoor activities like hiking, camping, or birdwatching. Telescopes, on the other hand, are usually larger and heavier and require more setup time and effort. They often come in multiple parts that need to be assembled and aligned, and require a stable surface or mount to prevent shaking or vibration. This makes them less portable and more suitable for stationary observation, such as astronomy or nature watching from a fixed location.

Field of View and Depth Perception

The field of view refers to the area of the scene that can be seen through the optical device. Binoculars have a wider field of view than telescopes, typically ranging from 4 to 8 degrees, while telescopes have a narrower field of view, ranging from 0.5 to 2 degrees. A wider field of view allows for a broader perspective and easier tracking of moving objects, while a narrower field of view provides more detail and clarity of stationary objects.

Depth perception is another important factor in optical devices. Binoculars provide a more natural and immersive 3D image due to their dual-lens design, which allows for binocular vision and depth perception. This makes them ideal for nature observation and sports viewing, as they can help distinguish objects at different distances and angles. Telescopes, on the other hand, provide a flatter and more 2D image due to their single-lens or mirror design. However, they can still provide depth perception through the use of eyepieces and filters that enhance contrast and detail.

Image Quality and Clarity

Image quality and clarity depend on various factors, such as optical coatings, glass quality, and light transmission. Binoculars and telescopes use different types of coatings to reduce glare, improve contrast, and protect the lenses from scratches and dust. Binoculars typically use multi-coated lenses, which have multiple layers of anti-reflective coatings, while telescopes use specialized coatings like dielectric or silver coatings on their mirrors.

Glass quality is also crucial in determining image quality and clarity. Binoculars and telescopes use different types of glass, such as ED (extra-low dispersion) or fluorite glass, to minimize chromatic aberration, which can cause color fringing and blurring around edges. Higher-end binoculars and telescopes also use phase-corrected prisms to improve resolution and contrast.

Light transmission is another important factor in optical devices, especially for observing dim or distant objects. Binoculars and telescopes use different types of lenses and coatings to maximize light transmission and minimize loss or distortion. However, telescopes have an advantage in this regard, as they can use larger apertures to gather more light and provide brighter and clearer images.

You can check reviews of telescopes here

Conclusion

In summary, both binoculars and telescopes have their advantages and disadvantages and are suited for different types of observation and activities. Binoculars are generally more portable, easier to use, and provide a wider field of view and natural viewing experience. Telescopes, on the other hand, provide higher magnification, and larger apertures, and are better suited for distant and faint objects, as well as astronomy and astrophotography. Ultimately, the choice between binoculars and telescopes depends on your specific needs, preferences, and budget. By considering the factors discussed in this article, you can make an informed decision and choose the right optical device for your next outdoor adventure or stargazing session.

FAQs

Q: Can I use binoculars for astronomy? 

A: Yes, binoculars can be used for astronomy, especially for observing the Moon, planets, and star clusters. However, they have limitations in terms of magnification and light-gathering power, so they may not be suitable for observing faint or distant objects like nebulae or galaxies.

Q: Can I use a telescope for birdwatching? 

A: Yes, telescopes can be used for birdwatching, especially for observing birds at great distances or in their natural habitats. However, they may require more setup time and effort than binoculars, and may not provide the same immersive and natural viewing experience.

Q: Which is better, binoculars or a telescope? 

A: It depends on your specific needs and preferences. Binoculars are generally more portable, easier to use, and better suited for close-range observation and natural viewing. Telescopes, on the other hand, provide higher magnification, and larger apertures, and are better suited for distant and faint objects, as well as astronomy and astrophotography.

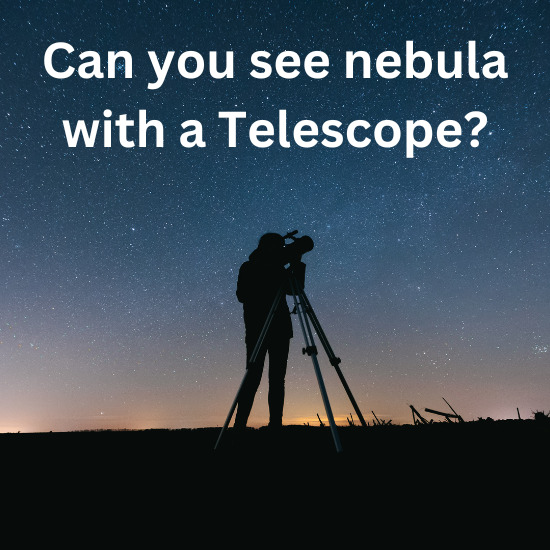
Can you see nebula with a Telescope |Tips for Nebula Hunting

can you see nebula with a telescope

The vast expanse of the cosmos is an endless source of wonder and inspiration for humanity. From the twinkling stars in the night sky to the distant galaxies millions of light-years away, the universe is a treasure trove of mysteries waiting to be explored. One of the most captivating sights in the night sky is a nebula, a cloud of gas and dust illuminated by nearby stars. But can you see a nebula with a telescope? In this article, we will delve into the answer to this question and explore the beauty and majesty of these cosmic wonders.

What is a nebula?

A nebula is a cloud of gas and dust in space illuminated by nearby stars. It is often the birthplace of new stars and planets. Nebulae come in many shapes and sizes, ranging from small, dense, and compact to large, diffuse, and complex. They are composed mainly of hydrogen and helium gas, along with dust particles, and can be found throughout the Milky Way galaxy and beyond. Nebulae are fascinating objects to study and observe, as they provide a glimpse into the formation and evolution of the universe.

Can You See Nebula With a Telescope?

Now that we have explored what nebulae are and how to observe them, the burning question remains: can you see a nebula with a telescope? The answer is a resounding yes! Nebulae are some of the most spectacular objects visible through a telescope.

However, whether or not you can see a nebula depends on several factors, including the size and brightness of the nebula, the aperture and magnification of your telescope, and the quality of the observing location. Some nebulae are bright and easy to spot, while others are more elusive and require patience, persistence, and the right conditions to observe.

The best time to observe nebulae is during the winter months when the night skies are darker and clearer. However, many nebulae can also be seen in the summer months, especially in areas with low light pollution. Some of the most popular nebulae for observation include the Orion Nebula, the Lagoon Nebula, the Eagle Nebula, and the Trifid Nebula.

Can you see nebula with a Telescope

Best Telescopes for Nebula Viewing

To see nebulae clearly, you need a telescope with a large aperture that can gather plenty of light. Refracting telescopes, reflecting telescopes, and compound telescopes are all suitable for observing nebulae, depending on your preferences and budget.

Refracting telescopes, also known as “dioptric” telescopes, use lenses to gather and focus light. They are ideal for observing bright nebulae and planets and are generally more compact and easier to use than other types of telescopes.

Reflecting telescopes, also known as “catadioptric” telescopes, use mirrors to gather and focus light. They are ideal for observing faint nebulae and galaxies and offer a wider field of view than refracting telescopes.

Compound telescopes, also known as “Schmidt-Cassegrain” telescopes, combine both lenses and mirrors to gather and focus light. They offer the best of both worlds, with a compact design and a wide field of view.

The aperture and magnification of your telescope also play a significant role in observing nebulae. The larger the aperture, the more light your telescope can gather, and the better the image quality will be. A magnification of around 50x to 100x is ideal for observing most nebulae.

Tips for Nebula Hunting

Observing nebulae can be a challenging but rewarding experience. Here are some tips:

  • Choose a dark observing location away from city lights and other sources of light pollution.
  • Allow your eyes to adapt to the darkness for at least 30 minutes before observing.
  • Use appropriate filters to enhance contrast and block out unwanted light.
  • Study star charts and apps to locate the position of nebulae in the night sky.
  • Experiment with different observing techniques and magnifications to find the best view.
  • Be patient and persistent, and enjoy the beauty and majesty of the cosmos.

You can check reviews of telescopes here

Conclusion

Nebulae are among the most beautiful and awe-inspiring objects in the night sky. With their swirling clouds of gas and dust, these cosmic phenomena offer a glimpse into the mysteries of the universe. While observing nebulae can be a challenging endeavor, the rewards are well worth the effort. By choosing the right equipment, location, and techniques, anyone can experience the wonder of seeing nebulae with a telescope.

FAQs

Q. How can you differentiate between a nebula and a galaxy?

A. A nebula is a cloud of gas and dust in space, while a galaxy is a collection of billions of stars, gas, and dust held together by gravity.

Q. How big are nebulae?

A. Nebulae can vary in size from a few light-years across to hundreds of light-years across.

Q. Are nebulae dangerous?

A. Most nebulae are not dangerous to humans, but some can emit harmful radiation.

Q. Can you see color in nebulae through a telescope?

A. Yes, many nebulae have distinct colors that can be seen through a telescope. The colors are caused by the emission and absorption of specific wavelengths of light by the gases and dust in the nebula.

Q. How long do nebulae last?

A. Nebulae can last for millions of years before dissipating or collapsing under their gravity.

Q. Can you see nebulae with the naked eye?

A. Some nebulae, such as the Orion Nebula, can be seen with the naked eye under dark skies. However, most nebulae are faint and require a telescope to observe.


How To Connect Phone To Celestron Telescope | Complete Guide

How To Connect Phone To Celestron Telescope
Astronomy enthusiasts and stargazers, rejoice! Technology has taken a giant leap, and now you can explore the night sky with more ease than ever before. Thanks to the rise of smartphone technology and some innovative apps, you can effortlessly connect your phone to a Celestron telescope for a seamless stargazing experience. In this comprehensive guide, we will walk you through the simple process of syncing your phone with a Celestron telescope and answer some of the common FAQs that come up.

Benefits of Connecting Your Phone to a Celestron Telescope

Before diving into the actual process of connecting your phone to your telescope, it’s important to understand the benefits of doing so. Smartphones offer several convenient features that not only enhance your stargazing experience but also make the overall process more efficient.
Some of the top benefits of connecting your phone to your telescope include:
  • Access to celestial databases and star maps.
  • Ability to track objects and display their detailed information.
  • Easy image capturing and sharing capabilities.
  • GPS assistance with alignment processes.
  • Record notes and observations while stargazing.

Essential Equipment and Accessories

To connect your phone to your Celestron telescope, you would need the following items and accessories:
Smartphone: Ensure your smartphone is compatible with the respective apps and accessories needed for the connection.
Telescope: A Celestron telescope (compatible models.
Adapter: A smartphone adapter that securely attaches your phone to the telescope’s eyepiece.
App: An appropriate app downloaded on your smartphone like Celestron’s SkyPortal App or similar.
Connecting Your Phone to Your Celestron Telescope

Connecting Your Phone to Your Celestron Telescope

Step 1: Download a compatible app (suggested: Celestron’s SkyPortal App) from your phone’s app store.
Step 2: Set up your Celestron telescope according to the manufacturer’s assembly instructions.
Step 3: Attach the smartphone adapter to the telescope’s eyepiece. Ensure that the adapter is securely fastened and aligned with the eyepiece.
Step 4: Connect your smartphone to the adapter, making sure it’s snug and secure.
Step 5: Launch the app on your smartphone and follow the on-screen prompts to connect and align it with your telescope.
Tips for Optimal Viewing Experience

Connecting your phone to your Celestron telescope can greatly enhance your stargazing experience, but there are a few tips to keep in mind for optimal viewing:

  • Use a sturdy tripod to support your telescope and minimize vibrations.
  • Allow your eyes to adjust to the darkness for at least 20 minutes before stargazing.
  • Use a red light flashlight or a red light filter on your phone to preserve your night vision.
  • Avoid using your phone screen at full brightness, which can affect your night vision and battery life.
  • Take breaks and rest your eyes to prevent eyestrain and fatigue.

Troubleshooting Common Issues

While connecting your phone to your Celestron telescope can greatly enhance your stargazing experience, there may be some common issues you encounter:

  • Connectivity issues: Make sure your phone and telescope are properly connected and that the WiFi or GPS module is functioning properly.
  • App issues: Ensure that you have downloaded a compatible astronomy app and that it is properly configured to connect to your Celestron telescope.
  • Power issues: Check that your telescope and WiFi or GPS module are properly powered and that your phone has sufficient battery life.
  • Alignment issues: If you are having difficulty locating celestial objects, make sure your telescope is properly aligned and that you are using the correct coordinates and settings in the astronomy app.

You can check reviews of telescopes here

Conclusion

Connecting your phone to a Celestron telescope can completely revolutionize your stargazing experience and open a whole new world of possibilities. The process is simple and requires just a few minutes of your time. With the right equipment and app, you can explore the cosmos with the power of technology right at your fingertips. Happy stargazing!

FAQs

Q. Is connecting my phone to my Celestronaut telescope difficult?
A. Connecting your phone to a Celestron telescope is a simple process, provided you have the necessary equipment and follow the step-by-step guide.
Q. How do I know if my telescope model is compatible with a smartphone?
A. Most Celestron telescopes are compatible with smartphones, but it’s always good to check the manufacturer’s website or user manual for specific information on your telescope model.
Q. Is there a specific type of smartphone adapter I should use for my Celestron telescope?
A. Adapters come in different sizes and compatibility options. Ensure that the adapter you purchase is designed for Celestron telescopes and compatible with the eyepiece on your telescope, as well as your smartphone model.
Q. Can the connection process damage my phone or my telescope in any way?
A. Provided you use the right accessories and follow the setup process carefully, connecting your phone to your Celestron telescope poses no risk to your devices.
Q. Which apps do you recommend for connecting my phone to my Celestron telescope?
A. Celestron’s SkyPortal App is specifically designed for their telescopes, making it a great choice. Other popular options include SkySafari, Stellarium, and Star Walk.

What is a Barlow Lens and How to Use it | Complete Guide

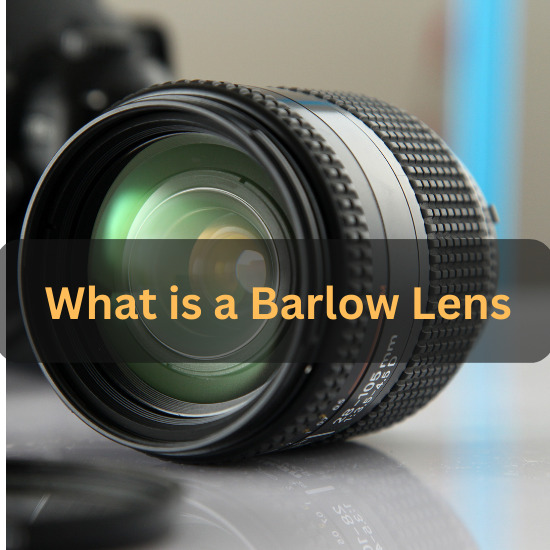
What is a Barlow Lens

A Barlow lens is an important piece of equipment for photographers and astrophotographers alike. It’s a special kind of lens that can be used to increase the magnification of an existing telescope or camera lens. The Barlow lens works by increasing the effective focal length, allowing you to take clearer, sharper photos from farther away. Let’s dive into what a Barlow lens is, how it works, and how you can use it in your photography.

What is a Barlow Lens?

A Barlow lens is an optical device made up of two lenses that are designed to increase the effective focal length of a telescope or camera lens. It’s usually mounted between the telescope or camera lens and the eyepiece or camera body. This allows you to achieve higher magnifications with less distortion than would be possible without using one. The main advantage of using a Barlow lens is that it allows you to take pictures at higher levels of magnification without having to buy additional lenses or cameras.

How Does a Barlow Lens Work?

When light passes through the first element of the Barlow lens, it converges at a point behind it before passing through the second element where its rays diverge again before entering your eye or camera sensor. By increasing this convergence, the effective focal length increases, resulting in increased magnifications without distorting images as much as other methods would do so. This makes it ideal for both amateur astronomy photography and terrestrial photography where increased magnification can help bring out details that might otherwise be too small to see clearly with basic equipment.

How Can You Use a Barlow Lens?

The most common way that photographers use a Barlow lens is for astrophotography – taking photographs of stars and planets from Earth-based telescopes. However, these lenses can be used for terrestrial photography as well. For example, if you have an older film SLR camera with limited zoom capabilities, then attaching one of these lenses could allow you to take more detailed photographs from further away than would otherwise be possible without one. Additionally, they’re also useful for macro photography taking close-up shots at very high magnifications which can result in some stunningly detailed images if done correctly.
Barlow Lens and how to use it

What Are The Benefits Of A Barlow Lens?

One of the major benefits of using a Barlow lens is that it allows photographers to get more out of their existing gear. By increasing the effective focal length, photographers can enjoy greater magnification capabilities without having to buy additional lenses or equipment. This makes it ideal for those just starting in photography as well as experienced professionals who don’t have access (or budget) to high-end telephoto lenses or other specialty optics.
In addition, the use of a Barlow lens can also help reduce chromatic aberration a common issue when shooting at long distances as well as help reduce vignetting and distortion when shooting wide-angle shots. The increased magnification also makes it easier for photographers to capture detailed macro images without having to invest in dedicated macro lenses, which can often be expensive and difficult to use due to their narrow field of view.
Finally, because they increase the effective focal length, they are also ideal for astrophotography and long-exposure shots where image clarity is paramount.

Are There Any Drawbacks To Using A Barlow Lens?

As with anything else in life, there are both pros and cons associated with using a Barlow lens. For instance, because they increase the effective focal length by two or three times, this means that the exposure time will be increased by that same amount as well; thus making them less than ideal for fast-moving subjects like wildlife or sports photography where speed is key.
Additionally, since they increase magnification at all distances (near and far), this can lead to reduced image quality if not used correctly particularly when shooting at longer distances as any slight movement will result in blurriness or lack of sharpness due to camera shake.
Finally, because they rely on digital processing rather than optical elements (like traditional lenses) there may be some instances where digital artifacts become visible in photos taken with a Barlow lens – but this can usually be remedied through post-processing techniques such as noise reduction software or plugins like Neat Image Pro Plus 8 (which is available for both Mac and PC).

Conclusion

A Barlow lens is an incredibly useful tool for any photographer looking to get better-quality images from their equipment without having to invest in new lenses or cameras. It’s relatively inexpensive compared to other equipment upgrades and its ability to increase magnification without distorting images makes it especially valuable for astrophotography enthusiasts who want clear shots of distant objects such as stars and planets from their telescopes on Earth-based observatories.
Additionally, its usefulness extends beyond astronomical applications; by allowing users to get closer shots than normal with their existing cameras and/or lenses, a Barlow lens can be used effectively for macro photography as well! Whether you’re an amateur astronomer looking for better photos from your telescope or just want more detail in your everyday shots than what your current setup provides – investing in one of these tools may prove invaluable!

FAQs

Q: What types of Barlow Lenses are there?
A: There are two main types of Barlow lenses: achromatic and apochromatic. Achromatic Barlow lenses are more affordable and suitable for general use, while apochromatic Barlow lenses are more expensive but provide superior image quality.

Q: How do I choose the right Barlow Lens for my telescope?
A: When choosing a Barlow lens, you should consider factors such as the focal length of your telescope, the desired magnification, and the type of telescope you have. It is also important to choose a Barlow lens that is compatible with the eyepieces you plan to use.

Q: Can a Barlow Lens be used with any telescope?
A: In general, Barlow lenses can be used with most telescopes. However, it is important to choose a Barlow lens that is compatible with your telescope’s focal length and eyepieces.

Q: What is the difference between a Barlow Lens and a Powermate?
A: A Powermate is a type of Barlow lens that uses a more complex optical design to provide superior image quality and a flatter field of view. However, Powermates are typically more expensive than traditional Barlow lenses.

What You Can See with a 150mm Telescope

What You Can See with a 150mm Telescope
If you are interested in stargazing, then you have probably considered investing in a telescope. Choosing the right telescope can be a daunting task, and if you settle on a 150mm telescope, you may be wondering what kind of sights you will be able to see through it. To help answer this question and make sure that you get the most out of your telescope purchase, here is an in-depth look at what you can see with a 150mm telescope.

Basics of Telescope Magnification

Telescopes are rated by their aperture size in other words, the diameter of their objective lenses or mirrors. A larger aperture means that more light will enter the telescope for clearer viewing. Generally speaking, telescopes with larger apertures will have better-magnifying power than those with smaller apertures because they can collect more light. The magnification power of your 150mm telescope should allow you to observe galaxies up to magnitude 13 (or even 14 in ideal viewing conditions). This means that it is sufficient for basic stargazing or even astrophotography.

What You Can See With Your Telescope

With your 150mm telescope, you should be able to see planets such as Jupiter and Saturn with impressive detail. You’ll also be able to view some galaxies like Andromeda or the Whirlpool Galaxy—as long as they’re visible during your night sky session and star clusters like the Pleiades or Beehive Cluster. On clear nights, when there’s little atmospheric interference and no moonlight to distract from faint objects, experienced amateur astronomers may even be able to spot planets around distant stars.

Advantages of using a 150mm telescope

A 150mm telescope holds the key to unlocking the wonders of the heavens. There are many advantages of using a 150mm telescope, let’s take a closer look.
Ideal Aperture for Beginners and Enthusiasts
The 150mm telescope is an excellent option for both beginners and seasoned stargazers due to its aperture size. The aperture – which pertains to the diameter of a telescope’s opening – determines the amount of light the telescope can gather. With a 6-inch (150mm) aperture, this telescope has an exceptional light-gathering capacity, making it perfect for observing a plethora of celestial objects such as planets, galaxies, and deep-sky objects with stunning detail and clarity.
Versatility and Portability
Another advantage of a 150mm telescope is its versatility and portability. This telescope size strikes the perfect balance between performance capabilities and ease of transport. Its relatively compact design allows you to take your telescope on a camping trip, set it up in your backyard, or even host a stargazing event at your local park. With a 150mm telescope, the night sky becomes your private viewing playground, no matter where you are.
Affordable Price Point
When it comes to purchasing a telescope, one of the most significant factors to consider is its cost. Luckily, a high-quality 150mm telescope is often available at a more reasonable price than larger models, making it accessible to a wider range of astronomy enthusiasts. With various manufacturers in the market today, you can shop around for a model that caters to your budget, without compromising on performance.
What You Can See with a 150mm Telescope
Upgradeable and Adaptable
As you delve deeper into the world of astronomy, you will likely develop an interest in specific aspects or types of celestial objects. The 150mm telescope is an ideal instrument for customization, as it offers a solid base for various upgrades and accessories. The addition of eyepieces, filters, and specialized lenses can enhance your observing experience and allow you to tailor your telescope to your growing interests.
Educational and Social Opportunities
One of the most overlooked advantages of owning a 150mm telescope is the wealth of educational and social opportunities it presents. By exploring the night sky, you gain insights into the vast universe and fundamental scientific concepts. Sharing your passion for stargazing with others can lead to fascinating discussions and meaningful connections, enriching your life beyond the lens of your telescope.

Conclusion

A 150mm aperture size provides sufficient magnification power for basic stargazing or even astrophotography. With your 150mm telescope, you should be able to observe planets such as Jupiter and Saturn with impressive detail as well as galaxies like Andromeda and star clusters like Pleiades or Beehive Cluster on clear nights without any obstructions blocking your view of the night sky. To get the most out of your purchase make sure that you pick an ideal location away from all sources of light pollution with high elevation so that any potential obstructions don’t limit your view! Happy stargazing!

FAQs

Q1: How much magnification do I need?
A1: As mentioned above, telescopes are rated by their aperture size (the diameter of their objective lenses). In general, bigger telescopes provide more magnification than smaller ones. A 150mm telescope should provide enough magnification for basic stargazing or astrophotography. However, if you want higher levels of magnification for more detailed views of distant objects, then consider investing in a bigger aperture sizes telescope such as 200mm or 250mm.
Q2: Is there an ideal location for using my telescope?  
A2: Yes! For optimal viewing conditions and maximum visibility, choose somewhere away from all sources of light pollution such as street lights or car headlights; find an area where it’s dark and there isn’t too much ambient light interference from surrounding buildings/homes, etc. Furthermore, try to select a spot with high elevation so that any potential obstructions like trees don’t limit your view of the night sky. If possible opt for high ground away from cities altogether!

Connecting a Telescope to Your Laptop | Comprehensive Guide

Connecting a Telescope to Your Laptop

If you are an astronomy enthusiast, you may have considered the idea of connecting your telescope to your laptop. By connecting your telescope to your laptop, you can use a wide range of software and apps that will help you get the most out of your telescope. In this article, we will provide step-by-step instructions for connecting your telescope to your laptop along with some frequently asked questions. Read on for more information!

Steps for Connecting a Telescope to Your Laptop

The first step is to purchase the correct cable for connecting your telescope to the computer. There are many different types of cables available, but make sure that you buy one that is compatible with both devices. You can find adapters for sale online or in tech stores near you.

Once you’ve purchased the correct cable, it’s time to set up the connection between the two devices. First, plug one end of the cable into the USB port on your laptop and then plug the other end into the port on the back of your telescope. Make sure that both plugs are firmly in place before continuing to the next step.

Now it’s time to install any necessary software or drivers onto your computer so that it can recognize and use the signals sent by your telescope’s port. Depending on which type of device you have, this process may vary slightly. Refer back to any manuals or guides provided by either device’s manufacturer if needed during this step.

Lastly, it’s time to test out your connection. Launch any software or apps designed specifically for use with telescopes and point them toward whatever astronomical object you want to observe using your new setup.

Software Settings

Now that you have connected your telescope to your laptop, it’s time to configure the software settings. Here are some tips:

  • Set your location and time zone in the software to ensure accurate pointing.
  • Adjust the slew rate to control the speed at which your telescope moves.
  • Configure the auto-guiding settings if you are using a compatible camera.

Capturing Images

If you have a compatible camera, you can use your laptop to capture stunning images of celestial objects. Here’s how:

  1. Connect the camera to your laptop using a USB cable.
  2. Launch the camera control software and select the appropriate camera model.
  3. Configure the image settings, such as exposure time and ISO.
  4. Choose the object you want to capture and start the imaging session.

You can check reviews of telescopes here

Conclusion

Connecting a telescope to a laptop is not difficult but requires careful attention when setting up correctly—it all comes down to having the right type of cable and making sure that each device’s ports match perfectly with those cables before powering them up together using specialized software/apps tailored just for astronomy purposes such as star gazing or even tracking satellites around Earth’s orbit in real-time! With these tips in mind, there is no limit when it comes to exploring outer space from home with just two pieces of technology – so happy stargazing everyone.

FAQs

Q: Do I need any special equipment?
A: Yes, you will need a specific type of cable for this process to work correctly and safely – be sure not to skimp out on quality when purchasing yours! Additionally, depending on which type of device(s) you have, there may be certain other pieces of equipment required as well (e.g., drivers).

Q: How do I know if my connection is established?
A: After following all steps listed above correctly, try launching some astronomy software or apps and pointing them towards an object in outer space – if all goes well then congratulations! You have successfully connected your telescope and laptop!

Q: Can I use my laptop as a monitor for my telescope?
A: Yes, absolutely – many astronomy enthusiasts opt for this option as it allows them more control over their observations than traditional monitors do (e.g., zoom functions). Just be sure that both devices are properly connected via their respective ports/cables first before attempting anything else!

Q. Can I connect any telescope to my laptop? 

A. No, you need a telescope with a computerized mount to connect it to your laptop.

Q. What is a USB-to-serial adapter cable? 

A. It’s a cable that converts the USB signal from your laptop to the serial signal required by the telescope mount.

Q. Do I need a camera to connect my telescope to my laptop? 

A. No, a camera is optional. You can still use your laptop to control your telescope without a camera.

Difference Between Refracting and Reflecting Telescope

Refracting telescope Vs Reflecting telescope

For centuries, astronomers have studied the night sky through telescopes. Today, there are two main types of telescopes: refracting and reflecting. Both are powerful tools for viewing the stars and planets, but they work in different ways. Let’s take a closer look at the differences between them.

Refracting Telescopes

A refracting telescope uses lenses to collect light from distant objects and magnify them so that they can be seen more clearly. The most familiar type of refracting telescope is the Galilean telescope, which was invented by Italian astronomer Galileo Galilei in 1609. This type of telescope uses two convex lenses – one at the front end of the tube and one at the other end to gather light and project it onto an eyepiece where it can be viewed.

How Does a Refractor Telescope Work?

A refractor telescope uses a combination of lenses and mirrors to focus light from distant objects onto the viewer’s eye. The telescope works by collecting light from an object and then focusing it with a series of lenses until it reaches the eyepiece lens. The eyepiece lens then magnifies the image for the viewer. Refractor telescopes are usually mounted on a tripod or other platform for stability.

The main components of a refractor telescope include the objective lens (the large lens at the front that collects light), the tube (which houses all the lenses and mirrors), and the eyepiece (where you look through). The objective lens collects light from distant objects and focuses it down into a narrow beam that is then passed through two or more additional lenses in its path before reaching your eye.

Refracting and Reflecting Telescope

This process helps to magnify what would otherwise be too small for us to see with our own eyes. The size of the objective lens determines how powerful your telescope will be; larger objectives will allow you to see more detail than smaller ones. Additionally, some refractors have an adjustable diaphragm, which can be used to limit the amount of light passing through when viewing very bright objects. This helps reduce glare and improve contrast in certain conditions such as observing planets or star clusters against dark backgrounds.

Advantages of Refracting Telescope

Let’s take a look at some of the main advantages of using a refracting telescope.

Portability & Durability
Refracting telescopes are lightweight and portable compared to other types of telescopes such as reflectors or catadioptrics. This makes them ideal for people who want to be able to easily move their telescope from one location to another or for those who don’t have a lot of space for a larger telescope. In addition, refractors are also more durable than other types of telescopes since they have fewer moving parts that could potentially break down over time.

Aesthetic Appeal
Refractor telescopes also have an aesthetic appeal that some people find attractive. The classic design with its large lens, brass fittings, and wooden tripod looks great in any room or outdoor space and can become an interesting conversation piece when visitors stop by.

Clear Views
Another major advantage of refractors is that they provide very clear views because there are no mirrors involved which can cause distortion. The lenses used in refractor telescopes also tend to be free from chromatic aberration, meaning that you will get clear images without any color fringing around bright stars or planets.

Reflecting Telescopes

Reflecting telescopes work differently than refractors; instead of using lenses to focus light, they use mirrors. A primary mirror is placed at the back end of a tube, while a secondary mirror sits in front of it to reflect light into an eyepiece on the side or top of the telescope for viewing. By bouncing light off multiple curved mirrors, reflecting telescopes can provide much greater magnification than their refractor counterparts. Some reflecting telescopes are so powerful that they can even detect exoplanets planets outside our solar system – that would otherwise be invisible to us.

How does a Reflecting Telescopes Work?

Reflecting telescopes rely on curved mirrors that bend and reflect light in a way that allows us to see distant objects with clarity. The main mirror is concave, meaning it curves inward, which helps to gather more light and create an image that is brighter than if it were flat. This makes them ideal for observing faint objects such as galaxies or nebulae.

Another advantage of a reflecting telescope is that it can be made larger than refractor telescopes while still maintaining its portability and ease of use. These larger sizes mean they can capture more light and create better images with greater detail and resolution.

Advantages of Reflecting Telescope

Let’s take a look at some of the main advantages of using a reflecting telescope

Light Gathering Power 
Reflecting telescopes are known for their superior light-gathering power. This is because they use mirrors to gather and magnify light instead of lenses like refracting telescopes do. This means that they can capture much more distant objects with greater clarity than their refracting counterparts. This makes them ideal for deep space exploration and observation, as well as observing objects in our own Solar System such as planets and moons.
Affordability 
Another advantage of reflecting telescopes is that they are usually much cheaper than refracting models. This is because mirror-based optics cost less than lens-based optics, which also require more complex construction and maintenance over time. As a result, reflecting telescopes are often the best option for amateur astronomers who want to get into astronomy without breaking the bank.
Portability 
Reflecting telescopes are also relatively portable compared to other types of astronomical instruments due to their lightweight design. This makes them great for amateur astronomers who like to take their equipment on camping trips or stargazing activities away from home. Plus, most reflector models can be easily disassembled when needed and reassembled when you’re ready to start viewing again!

You can check reviews of telescopes here

Conclusion

No matter what type you choose–reflector or refractor–both types of telescopes offer amazing views of deep space objects like galaxies, nebulae, star clusters, and more! If you’re looking for a way to explore our universe up close and personal, either type is sure to provide beautiful images and captivating experiences for years to come! And if you have any questions about these two types of scopes—or any other astronomy-related inquiries—don’t hesitate to ask a professional astronomer for advice! Happy stargazing!

FAQs

Q1: What is the best type of telescope?
A1: There is no single “best” type of telescope; different types have different advantages depending on what you want to observe and how much money you’re willing to spend. Generally speaking, refractors are often considered one of the best beginner telescopes due to their ease of use and relatively low maintenance requirements compared to other types like reflectors or catadioptrics.
Q2: How do I choose a good quality refractor telescope?
A2: When choosing a good quality refractor telescope, look for one with high-quality optics that has been carefully aligned by its manufacturer with minimal chromatic aberration (color fringing). Additionally, check if it comes with any accessories – such as finderscopes or mounting hardware – that may help enhance your viewing experience even further once set up at home. Lastly, make sure that it has enough magnification power for your needs; many entry-level models come equipped with lower-powered eyepieces but can be upgraded if needed later on down the line.

How To Use Telescope Elden Ring | Benefits of It

Telescope Elden Ring

Have you ever wanted to get a closer look at the stars? Using a telescope can help you do just that! Telescope Elden Ring is an excellent tool for viewing distant celestial objects, and it’s easy to use. In this article, we’ll cover everything you need to know about using a Telescope Elden Ring, from how to set it up to common questions and answers. Read on for our comprehensive guide!

How To Use Telescope Elden Ring

Using a Telescope Elden Ring is fairly straightforward. The first step is to assemble the telescope itself. Make sure that all parts are securely fastened before attempting to use the telescope. Once the telescope has been assembled, attach either an eyepiece or camera mount depending on your desired application. If using an eyepiece, place the eyepiece into the focuser before turning the focus knob until your desired object is in view.

If using a camera mount, attach your camera before adjusting focus accordingly. Finally, ensure that your tripod is secure before making any adjustments to the telescope itself; otherwise, you risk damaging both your equipment and yourself.

Once your Telescope Elden Ring is set up correctly, it’s time to start viewing distant celestial objects! Depending on where you live and what time of year it is, there will be different constellations visible in the night sky. Pointing your telescope toward these constellations can allow you to observe stars and other distant objects in greater detail than what can be seen with the naked eye. You may also want to explore other areas of space such as nebulae or galaxies (with appropriate filters). With practice comes knowledge the more time spent observing with your Telescope Elden Ring, the better equipped you will be to identify various celestial bodies and objects in no time!

Use Telescope Elden Ring

Benefits of using Elden ring in Telescope

Here are some of the benefits of using Elden Ring in a telescope:

  • Enhanced Viewing Experience: Elden Ring can be used as an add-on to a telescope’s eyepiece, providing a wider field of view and allowing you to see more of the night sky. This enhanced viewing experience can help you discover new celestial objects that you may not have been able to see before.
  • Improved Image Quality: Elden Ring can also help improve the image quality of the objects you are observing. It can reduce glare and other distortions caused by atmospheric conditions or light pollution, resulting in a clearer and sharper image.
  • Easy to Use: Elden Ring is easy to use and does not require any technical expertise. You simply attach it to your telescope’s eyepiece and start observing.
  • Versatility: Elden Ring can be used with a variety of telescopes, making it a versatile accessory. It can be used with a refractor, reflector, and catadioptric telescopes, allowing you to experiment and find the best setup for your needs.
  • Cost-effective: Elden Ring is a cost-effective alternative to other accessories used for improving the viewing experience, such as filters or high-end eyepieces. It provides a similar level of enhancement at a lower cost, making it an attractive option for beginners or those on a budget.

You can check reviews of telescopes here

Conclusion

With correct assembly and maintenance practices coupled together with appropriate accessories tailored towards specific observation needs (e..g UHC Filters), Telescopes like Telescopes Elder Rings can offer wonderful opportunities for amateur astronomers looking to explore beyond our planet’s atmosphere into deep space wonders like never before! So regardless if one wants to observe planets in detail, take photographs of distant nebulae, etc or just simply take pleasure from star gazing  Telescope Elder Rings provide great tools needed to fulfill these goals! Thanks for reading our comprehensive guide on how to use Telescope Elder Rings!

We hope this article has given you some insight into what’s involved when setting up and utilizing these powerful instruments for astronomy-related activities from simple stargazing sessions all way up to taking photographs of distant galaxies possibilities available today via the utilization of modern technology like Telescopes Elder rings have never been greater!

FAQs

Q: How do I make sure my telescope isn’t damaged while using it?

A: Most importantly, make sure that all parts are securely fastened before attempting any adjustments with the telescope itself. Additionally, avoid touching lenses or mirrors with bare hands as this could leave behind oils that could damage your equipment over time. If possible try cleaning lenses occasionally with lens cleaning solution for best results. Finally, ensure that your tripod is secure before making any adjustments to the telescope itself; otherwise, you risk damaging both your equipment and yourself.

Q: What type of filters should I use if I’m trying to view nebulae or galaxies?

A: Generally speaking, UHC (Ultra High Contrast) filters are recommended when observing faint objects such as nebulae or galaxies as they reduce background light pollution which makes faint objects easier for viewers to see clearly in their field of view. Additionally UHC filters are designed specifically for astronomical observation so they work well when paired with telescopes such as Telescopes Elden Rings.

Q: Can I take pictures through my Telescope Elden Ring?   

A: Yes! You can certainly take pictures through Telescopes Elden Rings by attaching a compatible camera mount onto its focuser shaft before taking pictures of distant celestial bodies or other space-related phenomena such as planets or moons etc! Be sure not only to check if you have all necessary components but also if they’re compatible with each other before attempting photography through Telescopes like Telescopes Eldens Rings since compatibility between components can vary based on brand/model etc.

Q. What is Telescope Elden Ring?

A. Telescope Elden Ring is an accessory that can be attached to a telescope’s eyepiece to provide a wider field of view and improve image quality.

Q. How do I attach Elden Ring to my telescope?

A. Elden Ring can be easily attached to the eyepiece of your telescope. Simply slide it over the eyepiece and tighten the set screws to hold it in place.

Q. What kind of telescopes can Elden Ring be used with?

A. Elden Ring can be used with a variety of telescopes, including refractors, reflector, and catadioptric telescopes.

Q. How does Elden Ring improve the viewing experience?

A. Elden Ring can improve the viewing experience by providing a wider field of view and reducing glare and other distortions caused by atmospheric conditions or light pollution.

Q. How do I focus my telescope with Elden Ring attached?

A. Focusing your telescope with Elden Ring attached is the same as without it. Simply adjust the focus knob until the image appears clear and sharp.

Q. Can Elden Ring be used for astrophotography

A. Yes, Elden Ring can be used for astrophotography. It can provide a wider field of view and improve image quality, making it a valuable accessory for capturing celestial objects.

Q. Is Elden Ring easy to use?

A. Yes, Elden Ring is easy to use and does not require any technical expertise. Simply attach it to your telescope’s eyepiece and start observing.

Q. Can Elden Ring be used for both daytime and nighttime observations?

A. Elden Ring is primarily designed for nighttime observations, but it can also be used for daytime observations with the appropriate solar filter.


What is the Primary Purpose of an astronomical Telescope?

Primary Purpose of an astronomical Telescope

Have you ever found yourself looking up at the night sky and wondering how much deeper you could explore? do you know  If so, then an astronomical telescope may be just the tool for you. But what is an astronomical telescope? What is the primary purpose of an astronomical telescope? In this article, we’ll provide a detailed overview of astronomical telescopes and answer some common questions.

What Is an Astronomical Telescope?

An astronomical telescope is a tool that allows us to observe objects in space that are too faint or too far away to be seen with the naked eye. It’s made up of one or more lenses or mirrors that collect light from a distant object and focus it onto an eyepiece where it can be viewed in greater detail. This process magnifies the image, allowing us to see things like stars, galaxies, planets, comets, and more.

How do astronomical telescopes work?

Astronomical telescopes work by collecting and focusing light from celestial objects. When light enters the primary lens or mirror, it is reflected or refracted and directed to the eyepiece, where it is magnified and forms an image. The quality of the image depends on the size and quality of the primary lens or mirror, as well as the design of the telescope.

What Is the Primary Purpose of an Astronomical Telescope?

The primary purpose of an astronomical telescope is to help us observe objects in space that are not visible to our eyes alone. From comets to exoplanets and beyond, there’s so much out there for us to explore—but without a telescope, most of it would remain hidden from view. Telescopes also allow us to study these objects in greater detail than ever before, revealing new information about them that was previously unknown.

What are the benefits of using an astronomical telescope?

Using an astronomical telescope has several benefits, including:

  • Allowing astronomers to observe celestial objects that are too faint or distant to be seen with the naked eye.
  • Providing detailed images of celestial objects, allows astronomers to study their properties and behavior.
  • Allowing astronomers to make accurate measurements of celestial objects, such as their size, distance, and composition.
  • Providing a platform for scientific research and discovery, which helps us to better understand the universe and our place in it.

Applications of astronomical telescopes

Astronomical telescopes have numerous applications in the field of astronomy, including:

  • Observing planets, stars, and galaxies: One of the most important applications of astronomical telescopes is observing celestial objects. The telescope allows astronomers to study the structure, composition, and behavior of planets, stars, and galaxies, providing valuable insight into the formation and evolution of the universe.
  • Discovering new celestial objects: Astronomers use telescopes to discover new celestial objects such as exoplanets, asteroids, and comets. By observing changes in the position, brightness, or spectrum of celestial objects, astronomers can identify new objects that were previously unknown.
  • Studying the universe’s history: Astronomical telescopes can be used to observe distant objects that emit light that has traveled billions of years to reach Earth. By studying this light, astronomers can learn about the conditions and processes that existed in the early universe.

What are the limitations of using an astronomical telescope?

Using an astronomical telescope also has some limitations, including:

  • Atmospheric distortion can cause images to appear blurry or distorted.
  • Light pollution, can make it difficult to observe faint celestial objects.
  • Limited field of view, which can make it difficult to observe large celestial objects or multiple objects at once.
  • Cost, as astronomical telescopes, can be expensive to purchase and maintain.

You can check reviews of telescopes here

Conclusion

Whether you’re looking for a casual way to observe the night sky or want something more advanced for studying distant objects in detail, an astronomical telescope can help open up your world to new depths of exploration. With this article as your guide, hopefully, you now have a better understanding of what these instruments are all about—and why they’re such incredible tools for astronomy enthusiasts everywhere! Best wishes on your journey through space!

FAQs

Q: What types of telescopes are available?

A: There are several different types of telescopes available on the market today, including refractors (which use lenses), reflectors (which use mirrors), and catadioptric telescopes (which combine both lens and mirror designs). Each type has its advantages and disadvantages depending on your needs and budget.

Q: How powerful should my telescope be?

A: That depends on what you plan to use it for! For general stargazing purposes, a lower-power telescope should suffice; however, if you plan on doing more advanced astrophotography or studying distant galaxies in detail, then you may want to invest in a higher-power instrument.

Q: What is the difference between an astronomical telescope and a terrestrial telescope? 

A: Astronomical telescopes are designed to observe objects in space, while terrestrial telescopes are designed to observe objects on Earth. Astronomical telescopes typically have larger apertures and longer focal lengths than terrestrial telescopes to gather more light and provide higher magnification.

Q: What are the types of telescopes used in astronomy? 

A: There are several types of telescopes used in astronomy, including refracting telescopes, reflecting telescopes, and catadioptric telescopes. Each type has its advantages and disadvantages, and astronomers choose the type of telescope based on their specific needs and the objects they want to observe.

Q: How does atmospheric distortion affect the performance of an astronomical telescope? 

A: Atmospheric distortion can cause images to appear blurry or distorted, making it difficult to observe fine details in celestial objects. To overcome this limitation, astronomers use techniques such as adaptive optics and interferometry to correct for atmospheric distortion.


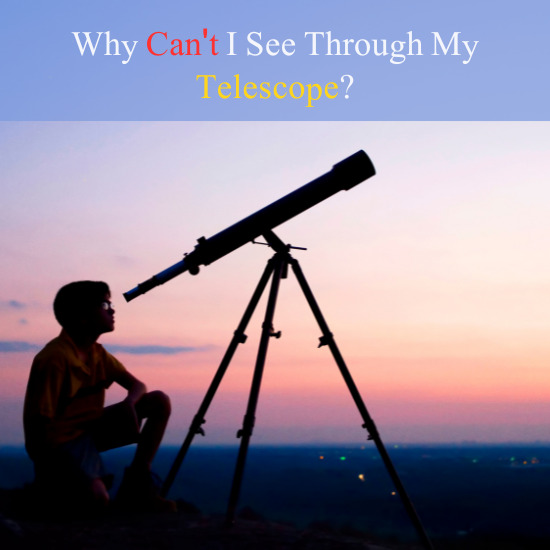
Why Can’t I See Through My Telescope?

Why Can't I See Through My Telescope

As astronomy enthusiasts, we know the excitement of stargazing and the desire to explore the celestial wonders above. However, sometimes we face challenges, such as difficulty seeing through our telescopes. This can be frustrating and leave us wondering what could be the cause. In this article, we will explore some of the common reasons why you can’t see through your telescope, and provide some tips to help you improve your stargazing experience.

Following are the common reasons why you can’t see through your telescope

Poor Quality Telescope

One of the most common reasons why you might be having difficulty seeing through your telescope is that it is of poor quality. If your telescope is not well-made or is of low quality, it may not provide the clear and sharp images that you are looking for. In this case, upgrading to a better-quality telescope may be the solution to your problem.

Dirty or Misaligned Optics

Another common reason why you might be having difficulty seeing through your telescope is that the optics are dirty or misaligned. Dust, dirt, and other debris can accumulate on the optics over time, which can reduce the clarity and brightness of the images you see. Additionally, if the optics are not aligned properly, the images may appear blurry or distorted. Cleaning the optics and realigning them may solve the problem.

Light Pollution

Light pollution is another factor that can affect your ability to see through your telescope. This occurs when artificial lighting from streetlights, buildings, and other sources obscures the view of the night sky. If you live in an area with high levels of light pollution, it may be difficult to see stars and other celestial objects. Consider finding a dark sky location or using a light pollution filter to improve your viewing experience.

Why Can't I See Through My Telescope

Atmospheric Conditions

Atmospheric conditions can also impact your ability to see through your telescope. Factors such as temperature, humidity, and air turbulence can cause the images to appear blurry or distorted. This is known as “seeing,” and it can be difficult to predict or control. However, you can try to minimize the impact of atmospheric conditions by observing during periods of stable weather and avoiding viewing objects close to the horizon.

Inadequate Magnification

In some cases, difficulty seeing through your telescope may be due to inadequate magnification. If you are trying to observe a distant object, such as a planet or galaxy, and the image appears small and dim, you may need to increase the magnification of your telescope. However, be careful not to exceed the maximum useful magnification of your telescope, as this can lead to blurry images.

Lack of Experience

Finally, it’s important to consider the role of experience when it comes to stargazing. If you are new to astronomy, it can take some time to develop the skills and knowledge necessary to observe objects through a telescope successfully. Take the time to learn about the equipment, the night sky, and the objects you are trying to observe. Joining a local astronomy club or taking a course can also help develop your skills and knowledge.

You can check reviews of telescopes here

Conclusion

In conclusion, there are many reasons why you might be having difficulty seeing through your telescope, but there are also many solutions. By upgrading your telescope, cleaning and aligning your optics, reducing light pollution, considering atmospheric conditions, using adequate magnification, and developing your skills and knowledge, you can improve your stargazing experience and enjoy the beauty of the night sky.

FAQs

Why can’t I see anything through my telescope? 

There could be several reasons why you are not able to see anything through your telescope. It could be due to incorrect alignment, dirty lenses or mirrors, or atmospheric conditions. Check your telescope’s manual for troubleshooting tips.

How do I properly align my telescope? 

To properly align your telescope, you will need to use a star chart or a smartphone app that helps you locate stars or planets. Follow the instructions in your telescope’s manual to align the telescope using the star chart or app.

What should I do if my telescope’s lenses or mirrors are dirty? 

If your telescope’s lenses or mirrors are dirty, clean them gently with a microfiber cloth or lens cleaning solution. Avoid using regular cleaning cloths or paper towels, as they may scratch the surface of the lens or mirror.

Can I use my telescope during the day? 

Yes, you can use your telescope during the day to view distant landscapes or birds. However, you will need a special filter to reduce the brightness of the sun and protect your eyes from damage.

Can I see planets or galaxies through my telescope? 

Yes, with the proper alignment and viewing conditions, you can see planets and galaxies through your telescope. Check your telescope’s manual for the recommended viewing conditions and positions.

How do I choose the right telescope for me? 

Choosing the right telescope depends on your viewing preferences and budget. Consider factors such as the size of the telescope, the type of mount, and the accessories included. Research different brands and models, and read reviews from other users before making a purchase.

Do I need any special equipment to use my telescope? 

In addition to the telescope itself, you may need additional accessories such as eyepieces, filters, and amounts. Check your telescope’s manual or consult with a knowledgeable salesperson to determine which accessories are necessary for your viewing needs.

How do I maintain my telescope? 

To maintain your telescope, store it in a dry, cool place when not in use, and cover it with a protective cover. Keep the lenses and mirrors clean, and avoid touching them with your fingers. Check your telescope’s manual for additional maintenance tips.

Can I use my smartphone to take pictures through my telescope? 

Yes, you can use a smartphone adapter to attach your phone to the telescope and take pictures of celestial objects. Check your telescope’s manual or consult with a knowledgeable salesperson to determine which adapter is compatible with your phone and telescope.